Tap Dodge: Balancing Failure Tolerance and Bullet Speed Curves
A deep dive into the tap dodge mechanic, analyzing hitbox tolerance settings and near-miss feedback to balance failure risk. We also explore constructing bullet speed curves to achieve smooth difficulty progression, providing core design strategies for developers to ensure both responsive controls and long-term player retention.
분석
- Is the hitbox wider or narrower than the visual target?
- Respawn protection and near-miss mechanics
- Making failures feel like 'my mistake'
- Ramp-up in the first 10 seconds
- Mid-game plateau
- Short burst at the end to create a highlight moment
핵심 코드
데모
아직 전용 데모가 없어, 해당 아키타입의 최소 플레이 가능 예제를 대신 넣었습니다.
아티클
Click Dodge: Tension via "Pressure", Retention via "Forgiveness"
The One-Sentence Essence
On the surface, it increases difficulty; actually, the core is using "edge-case"判定 and "near-miss feedback" to transform failure into a highlight; this article focuses on how to design explainable forgiveness and near-miss mechanisms.
Traffic reason: High tension, very watchable on short videos; viewers can immediately understand "barely missed death."
1) Forgiveness in Failure Judgment: Make Players Feel "I Made a Mistake", Not "The System Screwed Me"
Forgiveness doesn't make the game easier; it makes failure more explainable:
- Visuals vs. Judgment Separation: Bullets look like they grazed, but the judgment doesn't kill (players feel strong).
- Near-Miss Feedback: Slow-mo/sound effects/glows when grazing, turning "barely missed" into a highlight.
- Respawn Protection: Invincibility for 0.5~1s after revival, avoiding frustration from consecutive deaths.
A common pitfall: Making judgment too precise (like competitive games); casual players will just feel "this is unfair."
2) Bullet Speed Curve: Teach Them to Live Early, Make Them Steady Mid, Let Them Show Off Late
Suggested breakdown of one match into three segments:
- First 10s: Rapid Ramp-up (build tension)
- Mid-game: Plateau (let players practice stability)
- Late-game: Short Burst (create highlights and shareability)
If you linearly accelerate from 0, the early game is boring; if you start fast, newbies can't learn.
3) One Experience Goal You Can Use Directly
Set the goal for "first playthrough" as: Players die once, live once, die again within 20~40s. This satisfies both "tension" and "learnability."
One-sentence summary: The highlight of click dodge is "barely missed," so you must systematically engineer near-misses, not drive players away with precise judgment.
---
4) Near-Miss is Designable, Not Luck
If you want players to feel "barely missed," you need to make near-miss an explicit mechanic:
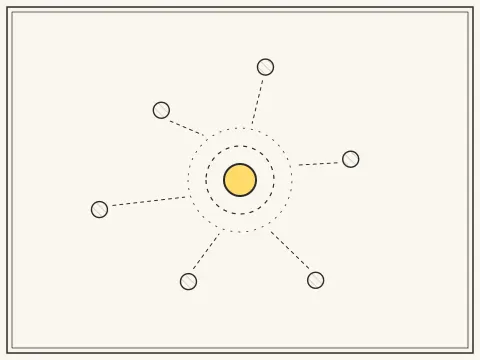
- Near-miss zone: Add a "grazing zone" ring outside the judgment circle
- Trigger condition: Bullet enters grazing zone but doesn't hit
- Feedback: Slow-mo 100~200ms / slight screen shake / sound effect / score bonus
This turns "barely failed" from frustration into a highlight, greatly boosting virality and replayability.
---
5) Bullet Spawning: Create Pressure via "Density", Not Just "Speed"
Relying only on acceleration easily leads to two problems:
- Late game becomes unplayable (players only have muscle memory)
- Early game is boring (too slow before acceleration)
A more stable approach is to split pressure into two dimensions:
- Speed
- Density (bullets per unit time / coverage)
Common curves:
- Speed: Rapid ramp-up early → plateau mid → burst late
- Density: Gradually increase, but leave "breathing room" (space for player movement)
---
6) Acceptance Goals (Metrics for First Playthrough)
Setting measurable experience metrics makes goals more stable:
- Newbie first match average survival
20~40s - At least one near-miss feedback within
60~90s(players feel "I'm strong") - Respawn protection avoids immediate quit due to "consecutive deaths"
Boundary Conditions
- No near-miss feedback triggered if bullet grazes outside the judgment circle but doesn't enter the "grazing zone."
- Ignore all bullet collision judgment if player is in respawn protection period (0.5~1s invincible).
- If bullet spawning density is too high leaving no movement space, adjust spawn rhythm or reduce quantity to leave "breathing room."
- If newbie first playthrough doesn't trigger near-miss feedback within 60~90s, check if speed curve is too flat.
- If player dies consecutively more than a certain count (e.g., 2 times), force end current match or extend respawn protection time to prevent frustration.
Design Trade-offs
- Benefit: Near-miss feedback makes players feel "barely missed death," boosting satisfaction and virality; Cost: If judgment is too precise, casual players feel "the system screwed me" and churn; Alternative: Simulate grazing via visuals/sound/slow-mo instead of modifying collision radius.
- Benefit: Speed curve uses "ramp-up - plateau - burst" three-segment structure, balancing tutorial, stability, and highlight moments; Cost: Pure linear acceleration leads to boring early game or unplayable late game; Alternative: Split pressure into "speed" and "density" independently controlled, with reserved breathing room.
- Benefit: Respawn protection period (0.5~1s invincible) avoids frustration from consecutive deaths; Cost: Extending invincibility time may reduce tension; Alternative: Maintain pressure by increasing bullet spawning density or adjusting speed curve, rather than simply extending invincibility time.
함께 볼 만한 글

120 seconds, 3 lives, 323 dots: eat and dodge through a block-city maze, where the 8-second power-pellet reversal is the only rhythm switch that matters.
This article dissects the core mechanics of roguelike slaying games, breaking down the construction of enemy density curves to create dynamic combat pacing. It explains how director systems use calculation to control enemy distribution for screen readability, analyzes hard rules limiting special effects to ensure visual clarity, and reveals the satisfaction derived from linear enemy growth paired with exponential player damage. The guide provides actionable advice for developers to balance numerical values with player experience.
A minimalist auto-runner case study: score equals distance, a one-obstacle-one-button mapping, and how a 0.6s dodge window keeps high speeds readable.